¶ Step-by-step guide to install Java Standalone/Spring Boot with environment variables
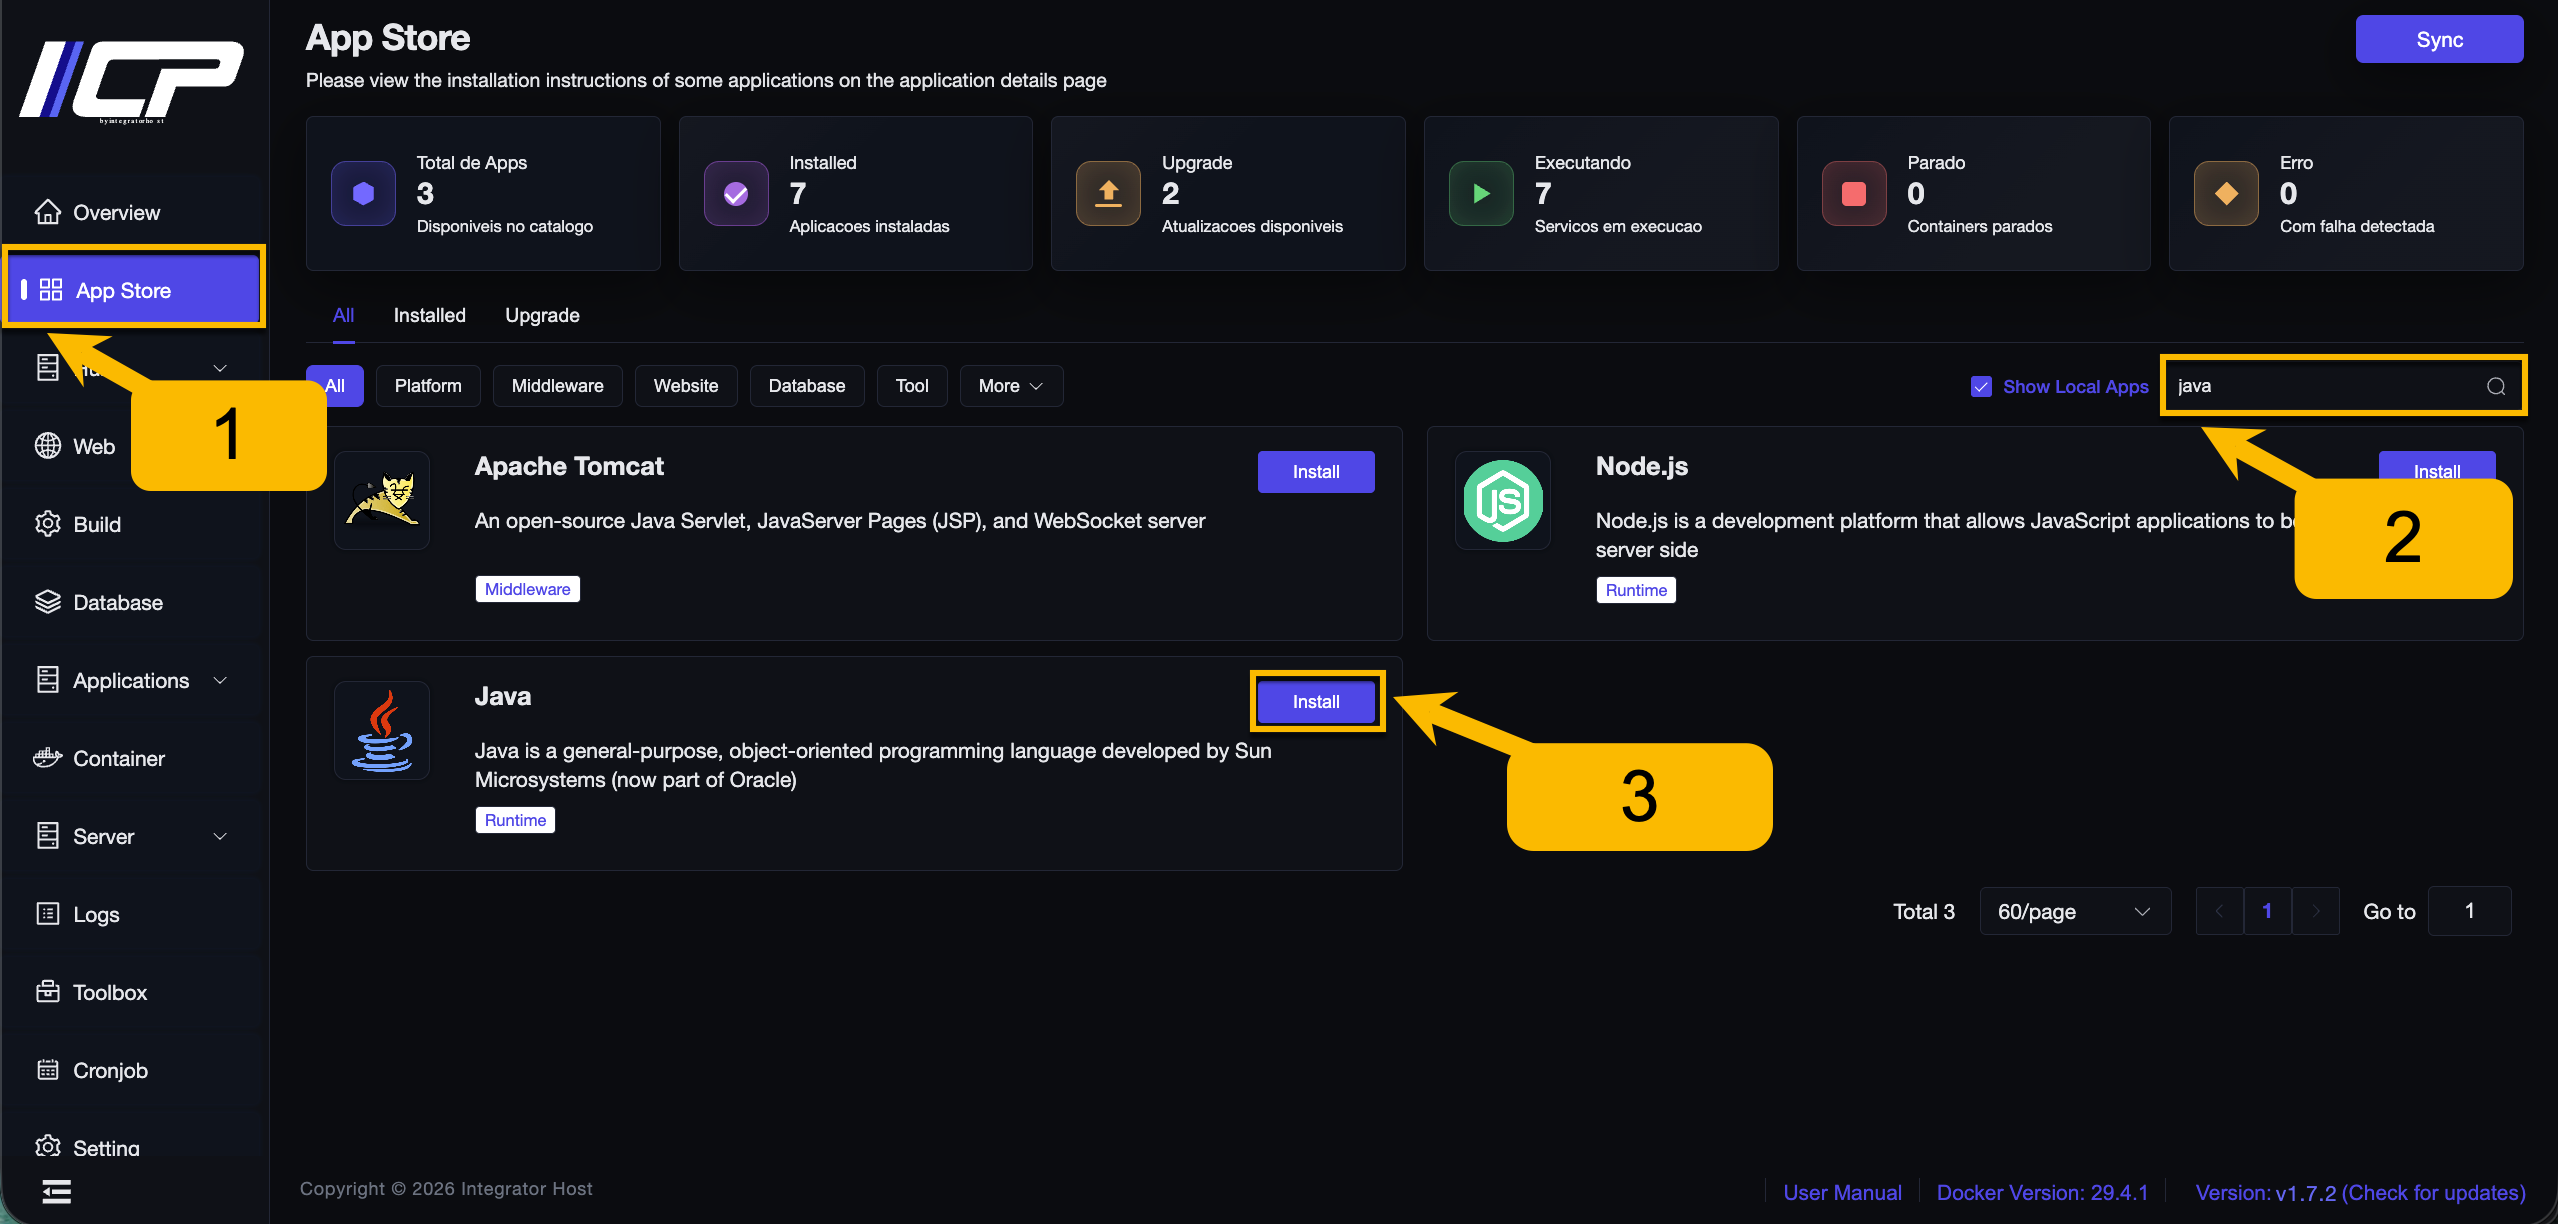
1. In the side menu, find and click App Store.
2. Search for the Java application.
3. Click the Install button.
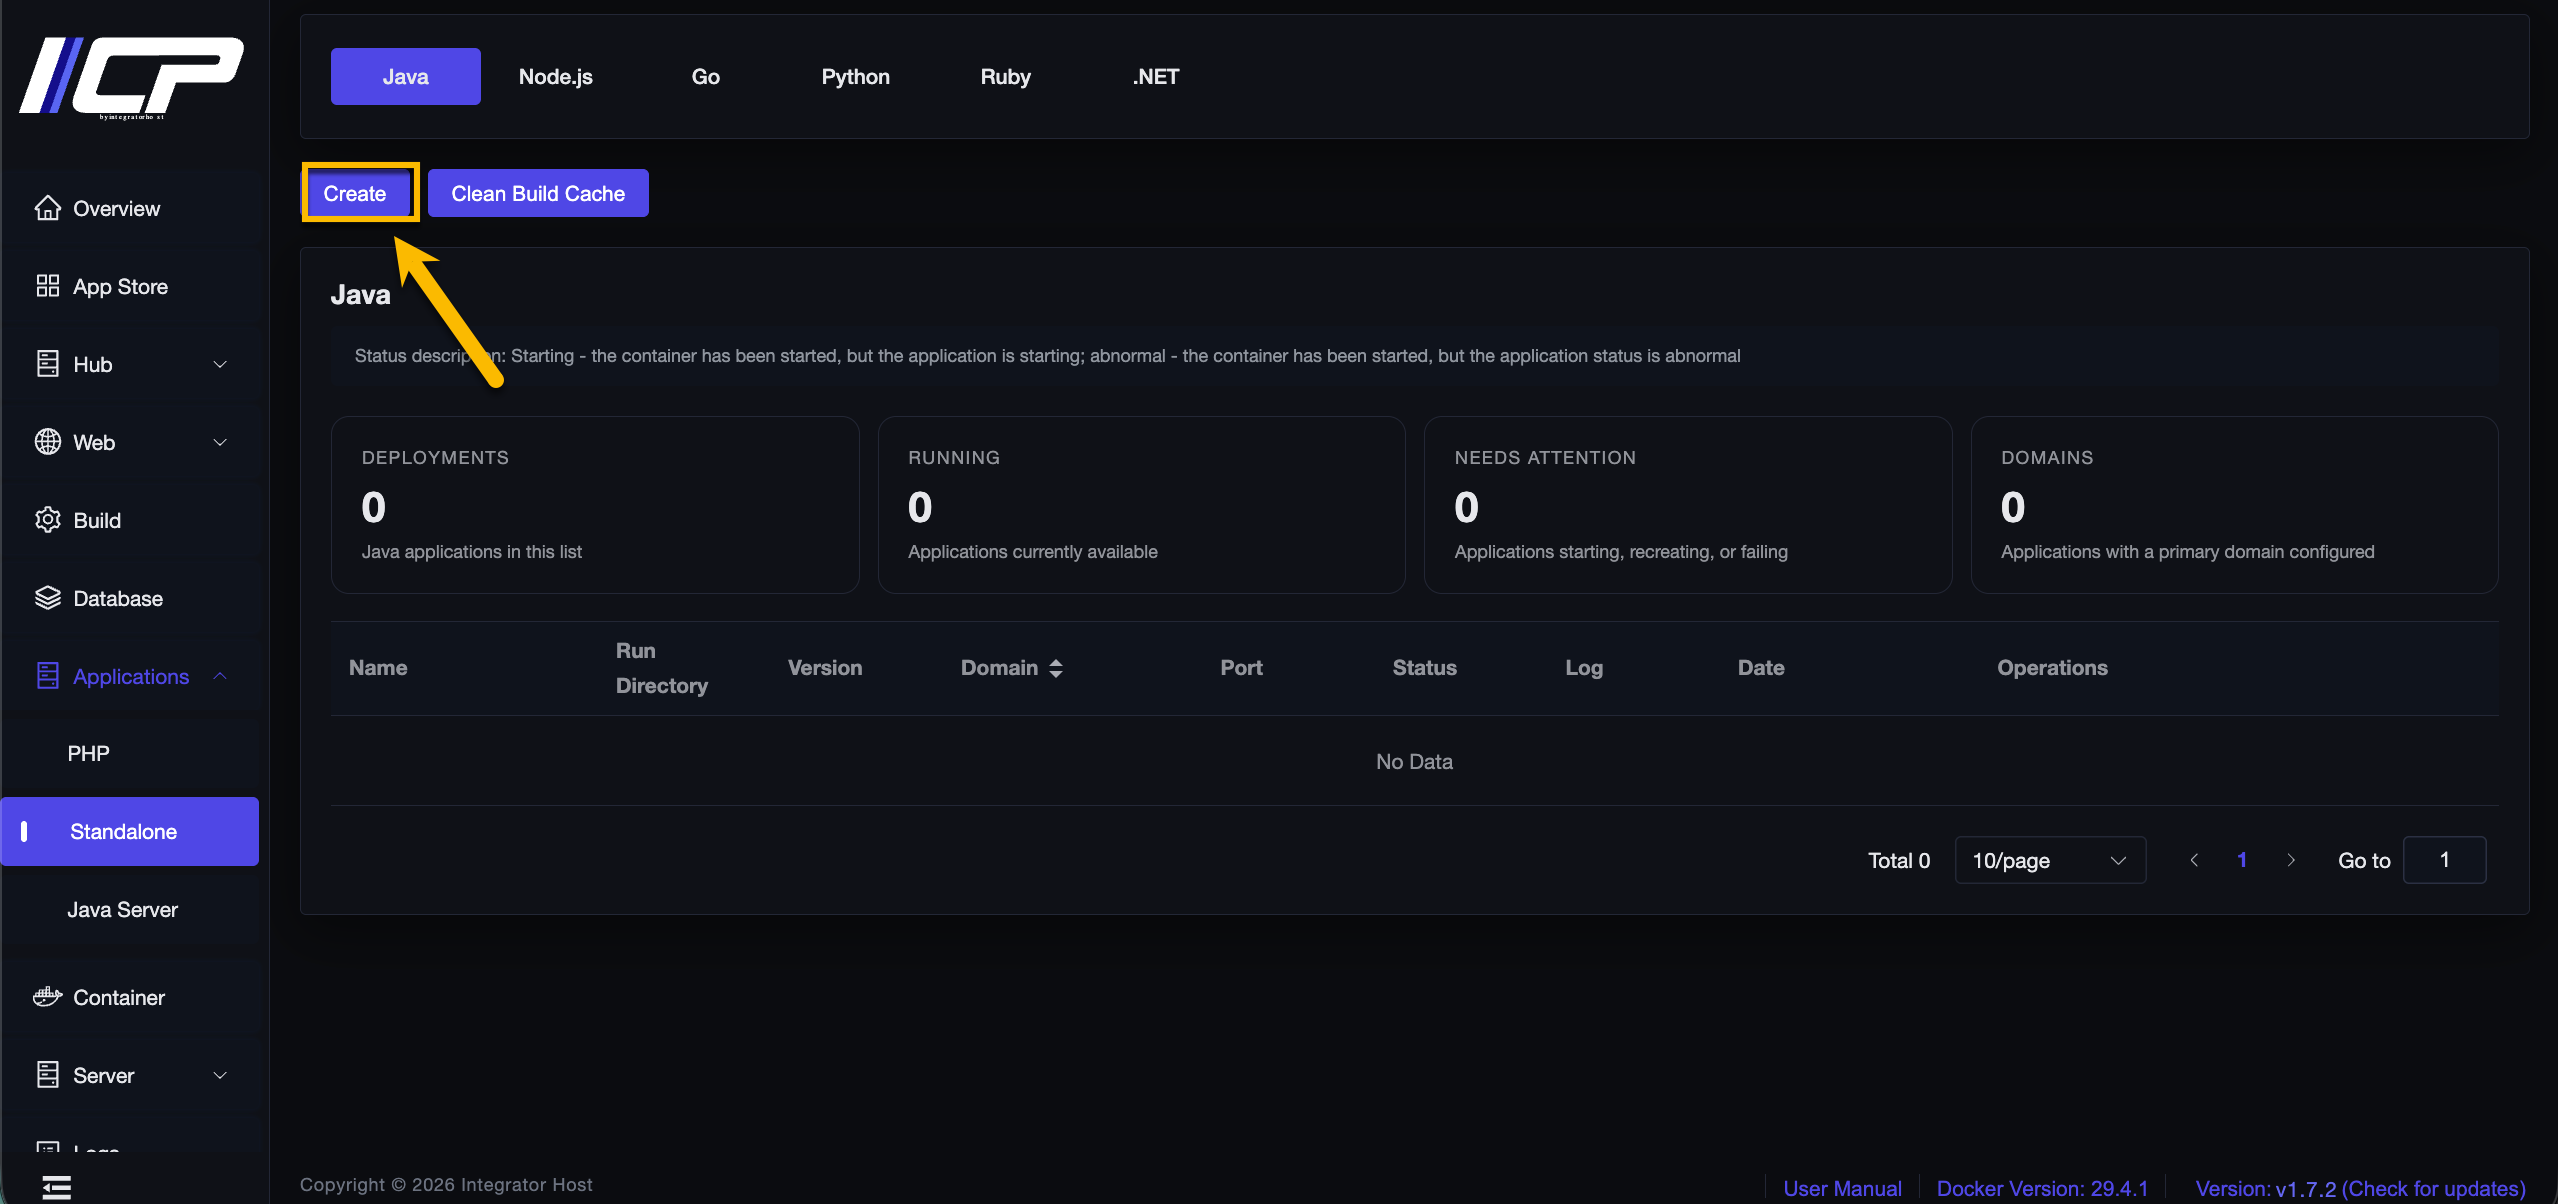
4. Click Create.
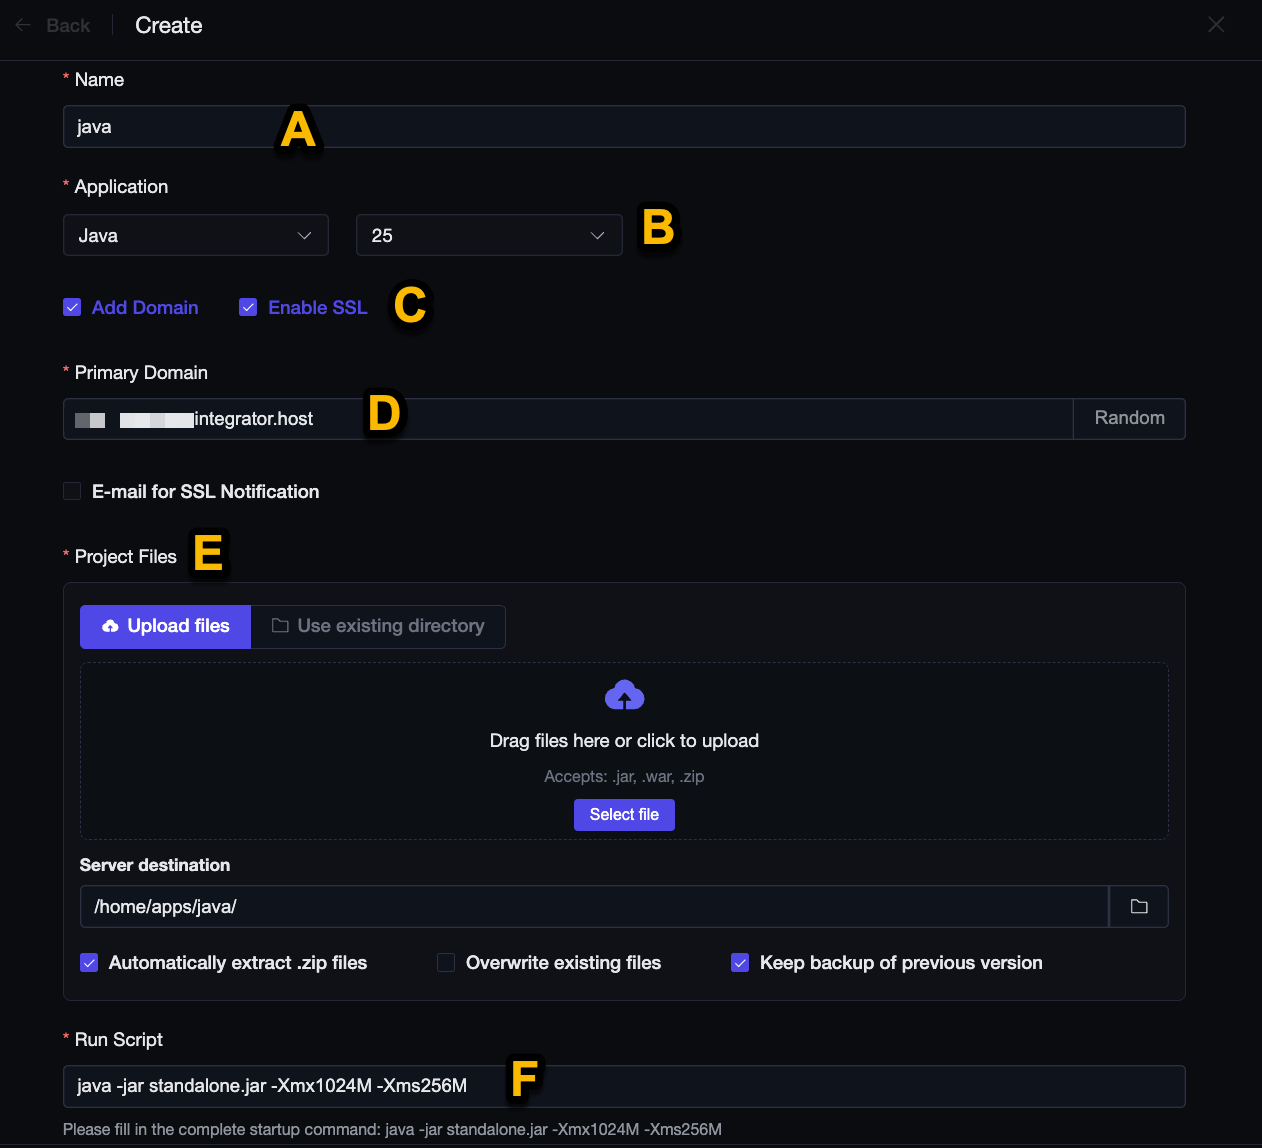
5. Fill in the following fields:
A. Enter your project name.
B. Choose the Java version.
C. Enable SSL.
D. Enter the domain → the domain must point to your machine!
E. Upload your project files or enter the existing directory where the project is located.
F. Enter the Execution Script → java -jar standalone.jar -Xmx1024M -Xms256M
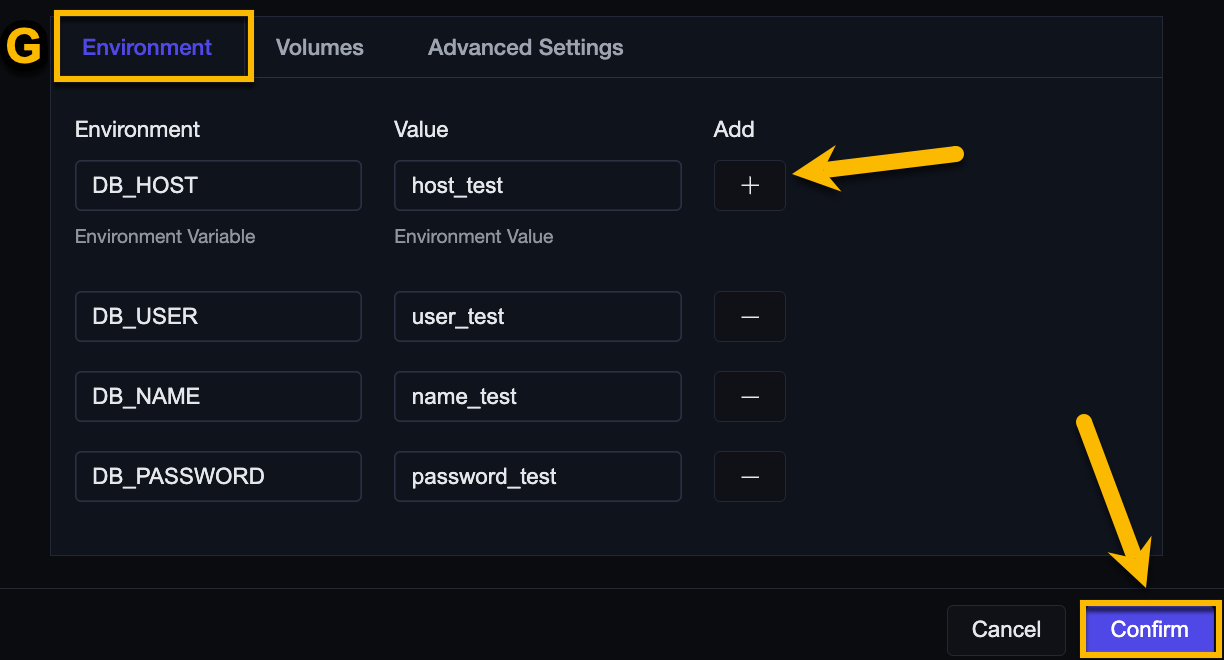
G. Add the environment variable together with its corresponding value.
Change the other creation fields as needed.
Finally, click the Confirm button.
How to configure start.sh as the Execution Script
Learn how to define start.sh so it automatically runs actions during the deploy process.
# start.sh

# Checks if the .env file exists in the Docker root directory
if [ -f "/.env" ]; then
    echo "Copying .env from the root directory to the current directory ./"
    cp /.env ./  # Copies the .env file to the current directory
else
    echo "Warning: .env file not found in the Docker root directory."
fi

# Runs the Java application
java -jar standalone.jar -Xmx1024M -Xms256M
6. Done!